The Sheinburger

Self-serving content since 2014

Chef Recipes Expanded

So here are some chef notes. I watched some videos, read some documentation and then I wrote some notes. I should probably find a new hobby.

The Chef-client run process

This page provides a good starting point and diagram. I extracted the high-level steps as follows:

  1. Get configuration data – Node gets process configuration data from it’s own client.rb and from ohai
  2. authentication – client authenticates to the chef server using RSA keys and node name. On first run, the chef-validator will be used to generate the RSA private key.
  3. get, rebuild node object – client pulls down node object from server and rebuilds it.
  4. expand the run-list – chef client expands the full run-list from the latest node object that should be applied and in what order.
  5. sync cookbooks – asks the chef for required cookbook files and pulls down any changed and new files (compared to whats in cache from last run)
  6. Reset node attributes – attributes in rebuilt node object are reset and refilled with attributes from files, environments, roles, and ohai.
  7. Compile resource collection – determine all resources that will be needed to process the run-list
  8. Converge the node – client configures the system based on info collected
  9. Update the node object, process exception and report handlers – client updates node object on server and will go through any exception and report handling as necessary.

Authentication and Authorization

Communication done via Chef Server API via REST. The server requires authentication via public keys. Public keys stored on chef server, private keys on nodes. The chef-client and knife tools all use the Chef Server API and will sign a special group of HTTP headers with the private key.

During the first chef-client run, there is no private key so the chef-client will try the private key assigned to the chef-validator. Assuming that goes successfully, the chef-client will obtain a client.pem private key for future authentication.

The chef-client authentication workflow:

  1. Look in /etc/chef/client.pem for a node private key
  2. If that doesn’t work, check the validator in /etc/chef/validation.pem

During an initial knife bootstrap, knife will copy the validation pem over to the node to do an initial chef-client run.

Compile and Execute

This stage iterating through our run list resources, collecting that into a list, and then iterating over that on the client to determine next action. Chef client will compare to see if the resource is in the appropriate state. If it is already there, no action is taken. Otherwise, the client will work to put it in the desired state.

Node Object

  • Any machine configured to be maintained by Chef
  • Node object is always available to you from within a recipe
  • Each node must have a unique name within an organization. Chef defaults to the FQDN.

  • Nodes are made up of attributes

    • Many are discovered automatically (ohai)
    • Other objects in Chef can add Node attributes (cookbooks, roles/environments, recipes, attribute files)
    • Nodes are stored and indexed on the Chef server

You can quickly get various attribute data from your node through knife or ohai

1
2
3
4
5
6
7
8
9
10
11
12
13
14
15
16
17
18
19
20
21
22
23
24
25
26
27
28
# From the chef node directly
$ sudo ohai

# Or from the knife output
$ knife node list chefclient -l

# You can modify formatting options 
# $ knife node list {clientname} -F{format}
$ knife node list chefclient -Fj
{
  "name": "chefclient",
  "chef_environment": "_default",
  "run_list": [
    "recipe[apt]",
    "recipe[apache_tutorial]"
  ],
  "normal": {
    "tags": [
    ]

  }
}

# List a specific attribute with -a
# $ knife node list clientname -a {attribute}
$ knife node list chefclient -a platform_version
chefclient:
  platform_version: 12.04

Knife searches are based on Apache Solr and are in the format:

1
key:search_pattern
  • Key = field name found
  • search pattern = what will be searched for

Examples:

1
2
3
4
5
# Wildcard over everything
knife search node '*:*'

# Search for node running ubuntu
knife search node 'platform:ubuntu'

Templates and Cross platform

You can utilize Ruby within the recipe which can help to create dynamic run-lists. Combining variables, loops, case statements, etc. can make for some powerful conditional recipes.

Variable usage:

1
2
3
4
5
6
7
8
9
package_name = "apache2"

if node[:platform] == "centos"
    package_name = "httpd"
end

package package_name do
  action :install
end

Case usage:

1
2
3
4
5
6
7
8
9
10
11
package "apache2" do
  case node[:platform]
  when "centos","redhat","fedora","suse"
    package_name "httpd"
  when "debian","ubuntu"
    package_name "apache2"
  when "arch"
    package_name "apache"
  end
  action :install
end

Array iteration:

1
2
3
["apache2", "apache2-mpm"].each do |p|
  package p
end

We can utilize an Embedded Ruby template instead of static files that will be dynamically modified when copied down to our node. These are commonly named with a .erb suffix and can contain ruby code within text. In order to embed ruby we will need to utilize the <%= %> tag:

1
2
3
4
5
<html>
<p>
    Hello, <%= "my name is #{$ruby}" %>
</p>
</html>

We can feed in a template file with the template resource like this:

1
2
3
4
5
6
7
8
9
10
template "/etc/sudoers" do
  source "sudoers.erb"
  mode 0440
  owner "root"
  group "root"
  variables({
     :sudoers_groups => node[:authorization][:sudo][:groups],
     :sudoers_users => node[:authorization][:sudo][:users]
  })
end

The sudoers.erb file referenced above will need to go into the templates/default/sudoers.erb instead of a typical file path at files/default/sudoers.erb. Chef will try to match up the most specific file by the client platform though and will look in this order:

templates/ 1. host-node[:fqdn]/ 2. node[:platform]-node[:platform_version]/ 3. node[:platform]-version_components/ 4. node[:platform]/ 5. default/

For example, you could store the file in templates/ubuntu-12.04/sudoers.erb.

Attributes

Attributes are specific details about a node and can be assigned from one of the following locations:

  • Nodes (collected by Ohai at the start of each chef-client run)
  • Attribute files (in cookbooks)
  • Recipes (in cookbooks)
  • Environments
  • Roles

The precedence level that determines which attribute is applied is as follows :

  1. A default attribute located in a cookbook attribute file
  2. A default attribute located in a recipe
  3. A default attribute located in an environment
  4. A default attribute located in role
  5. A force_default attribute located in a cookbook attribute file
  6. A force_default attribute located in a recipe
  7. A normal attribute located in a cookbook attribute file
  8. A normal attribute located in a recipe
  9. An override attribute located in a cookbook attribute file
  10. An override attribute located in a recipe
  11. An override attribute located in a role
  12. An override attribute located in an environment
  13. A force_override attribute located in a cookbook attribute file
  14. A force_override attribute located in a recipe
  15. An automatic attribute identified by Ohai at the start of the chef-client run

You can more directly influence precedence by taking advantage of attribute types when getting and setting. The types available are (in order of precedence, lowest to highest):

  • default – lowest precedence, should be used in cookbooks when possible
  • force_default – force attribute in cookbook to take over default set in an environment or role
  • normal – not reset during chef-client run and has higher precedence than default
  • override – reset at start of each client run
  • force_override – ensure override in cookbook takes over for an override attribute in a role or environment
  • automatic – discovered by ohai and has highest precedence

To store attributes in a cookbook, we can place them in attributes/default.rb:

1
2
3
4
5
6
7
# node object is implicit so we can actually do either of the following:
node.default[:apache][:dir]          = "/etc/apache2"
node.default[:apache][:listen_ports] = [ "80","443" ]

# OR
default[:apache][:dir]          = "/etc/apache2"
default[:apache][:listen_ports] = [ "80","443" ]

Roles

A good way to bridge together cookbooks and attributes for re-use. To start a role, start by creating an .rb file in your roles/ folder in the chef repository. Here is an example of the three required attributes:

1
2
3
4
# roles/webserver.rb
name "webserver"
description "The base role for systems that serve HTTP traffic"
run_list "recipe[apache2]", "recipe[apache2::mod_ssl]", "role[monitor]"

Common role tasks in knife:

1
2
3
4
5
6
7
8
9
10
11
12
13
14
# Upload a role
knife role from file webserver.rb

# Show roles
knife role list

# Show details on a specific role
knife role show webserver

# Delete a role
knife role delete webserver

# Add a role to a node
knife node run_list add chefclient 'role[webserver]'

Environments

A way to logically break up workflow and reflect organizational patterns. Every node can be assigned to a single environment. By default, all nodes are part of the _default environment. You can create a new environment by creating a *.rb file in the environments folder of the chef-repo. This process is very similar to creating a new role. Your environment file needs a name, cookbook, description (default_attributes and override_attributes are optional):

1
2
3
4
5
# environments/dev.rb
name "dev"
description "The development environment"
cookbook_versions  "couchdb" => "= 11.0.0"
default_attributes "apache2" => { "listen_ports" => [ "80", "443" ] }

Here are some environment management commands from knife:

1
2
3
4
5
6
7
8
# Create environment from dev.rb file
knife environment create from file dev.rb

# Show available environments
knife environment list

# Show environment assignment for a node
knife node show $nodename | grep ^Env

It appears you’ll have to use a plugin to knife to modify environments but otherwise it is a very trivial task to perform from the chef server web interface.

Community Cookbooks

There is a great online resource for interacting with cookbooks from others online at http://community.opscode.com/cookbooks. Once you find a good looking cookbook you’d like to pull into your own environment (after proper vetting of course), you can use knife to assist here:

1
2
3
4
5
6
7
8
9
10
11
# search the community site
knife cookbook site search chef-client

# show detail about a particular package
knife cookbook site show chef-client

# download community cookbook into local tar file
knife cookbook site download chef-client

# Install cookbook into cookbooks directory and commit changes
knife cookbook site install chef-client

From what I can tell, using the site install command is against chef best practices. You really should be vetting third-party code before pulling it down and committing it to your environment. There is a great community of chef tools and knife plugins out there. The Opscode folks have singled out some of the most common in the Chef Development Kit.

Okay! Great notes everyone!
Reference

Jenkins Primer

Installation

Following directions from the Jenkins site, these are my notes to configuring a base Jenkins setup on Ubuntu 12.04. Let’s first start by adding the jenkins repository, refreshing the apt repository listing, installing, and starting up:

1
2
3
4
5
wget -q -O - http://pkg.jenkins-ci.org/debian/jenkins-ci.org.key | sudo apt-key add -
sudo sh -c 'echo deb http://pkg.jenkins-ci.org/debian binary/ > /etc/apt/sources.list.d/jenkins.list'
sudo apt-get update
sudo apt-get install jenkins
sudo service jenkins start

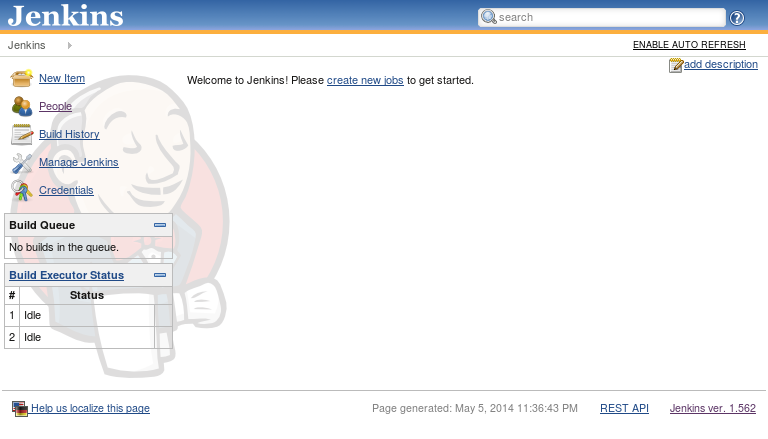
By default, you’ll be able to reach the jenkins server over HTTP on port 8080. Here is the screen you are greeted with:

Our jekins configuration files live at /var/lib/jenkins which happens to be the home directory for our new jenkins user. Here is a default directory listing upon installation:

1
2
3
4
5
6
7
8
9
10
11
12
13
14
15
16
17
18
19
20
21
22
23
24
jenkins@precise64:~$ tree -d -L 2
.
|-- jobs
|-- plugins
|   |-- ant
|   |-- antisamy-markup-formatter
|   |-- credentials
|   |-- cvs
|   |-- external-monitor-job
|   |-- javadoc
|   |-- ldap
|   |-- mailer
|   |-- matrix-auth
|   |-- matrix-project
|   |-- maven-plugin
|   |-- pam-auth
|   |-- ssh-credentials
|   |-- ssh-slaves
|   |-- subversion
|   |-- translation
|   `-- windows-slaves
|-- secrets
|-- updates
`-- userContent

Plug-ins

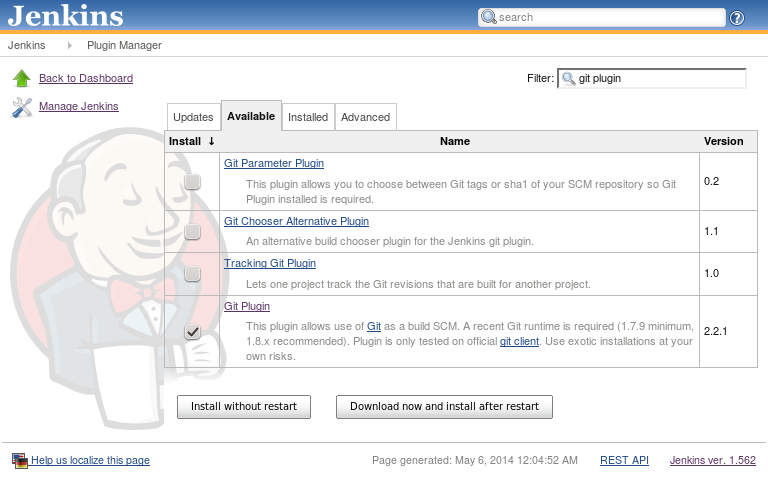
Jenkins is configurable with community plugins. For my project, I wanted to include git support but by default jenkins only supports CVS and subversion. Turns out you can easily install plugins via the web-interface. Make sure you already have git installed on the jenkins server. From the main page:

  1. click Manage Jekins
  2. Manage Plugins
  3. Available
  4. Type ‘git plugin’ in the search bar
  5. Select the Git Plugin and Download and Reboot
  6. Select the option to reboot when no jobs are running

Run tests against a git project

From our main jenkins page:

  1. New item
  2. Fill out Item name and select Build a free-style software project
  3. Scroll down to source code management and select git
  4. Enter the URL of the git repository and any credentials you may need. For my test purposes I pointed to a file-system path that I have shared with my jenkins test server. If jenkins can’t reach the git URL you’ll get an error before you hit save which is nice.
  5. Under Build Triggers – set up a schedule under Poll SCM. The syntax is similar to Unix crontab. The documentation recommends that you utilize an H in place of a field in order to help distribute the workload amongst multiple jobs. For example H * * * * will run a job every hour at a variable minute related to other scheduled jobs.
  6. Finally under build/Execute Shell – set up the scripts that are necessary for testing your project. Here was an example for mine that I found from a blogger :
1
2
3
4
5
6
7
8
PATH=$WORKSPACE/venv/bin:/usr/local/bin:$PATH
if [ ! -d "venv" ]; then
        virtualenv venv
fi
. venv/bin/activate

pip install -r requirements.txt
nosetests -v -s

You can manually kick off a build from the Jenkins job page using Build now. You can follow it live with the console view to see the output from the scripts. The git files will be pulled into your build workspace which for our Ubuntu install was /var/lib/jenkins/jobs/project_name/workspace/

Git Hook

You can tie a build into your git repo using a git hook and by supplying a specially formatted HTTP GET request to your jenkins server. You won’t have to authenticate to jenkins to kick this off, so just keep that in mind during deployment. It is recommended to use curl to kick this off using the following format:

curl http://yourserver/jenkins/git/notifyCommit?url=<URL of the Git repository>[&branches=branch1[,branch2]*][&sha1=<commit ID>]

The git jenkins plugin will determine what jobs are associated with the <URL of the Git repository> and start those builds. You’ll need to setup some kind of polling configuration on the job in order for this to work right.

Overall it was fairly painless to get it up and running for testing purposes. I didn’t do any due dilligence to lock this down in my vagrant environment but that would be a primary concern for me when rolling this out in a production environment.

Chef - Getting Started With Recipes

Check out my primer chef document for how to initially configure your chef test environment with vagrant. This document assumes you are starting from there.

Apache Tutorial Cookbook

These are my expanded notes from one of the official docs. Before we proceed, let’s take a quick look at the default chef-repo tree:

1
2
3
4
5
6
7
8
chef-repo
├── .chef
├── certificates
├── config
├── cookbooks
├── data_bags
├── environments
└── roles

When you are inside that directory and have already configured your knife config file, you can start a cookbook with:

1
knife cookbook create apache_tutorial

Let’s see how this changes our workspace:

1
2
3
4
5
6
7
8
9
10
11
12
13
14
15
16
17
chef-repo
└── cookbooks
        └── apache_tutorial
            ├── attributes
            ├── CHANGELOG.md
            ├── definitions
            ├── files
            │   └── default
            ├── libraries
            ├── metadata.rb
            ├── providers
            ├── README.md
            ├── recipes
            │   └── default.rb
            ├── resources
            └── templates
                └── default

Make the following modifications:

recipes/default.rb:

1
2
3
4
5
6
7
8
9
10
11
12
package "apache2" do
  action :install
end

service "apache2" do
  action [ :enable, :start ]
end

cookbook_file "/var/www/index.html" do
  source "index.html"
  mode "0644"
end

files/default/index.html:

1
2
3
4
5
<html>
<body>
  <h1>Hello, world!</h1>
</body>
</html>

Upload that recipe to the chef server:

1
$ knife cookbook upload apache_tutorial

Run List

Now we need to add that recipe to our node’s run list. To verify the run list of a node:

1
2
3
4
5
6
7
8
9
10
$ knife node show chefclient
Node Name:   chefclient
Environment: _default
FQDN:        ChefClient
IP:          10.0.2.15
Run List:    
Roles:       
Recipes:     
Platform:    ubuntu 12.04
Tags:

Let’s add our apache recipe to that node’s runlist and confirm:

1
2
3
4
5
6
7
8
9
10
11
12
13
14
$ knife node run_list add chefclient apache_tutorial
chefclient:
  run_list: recipe[apache_tutorial]

$ knife node show chefclient
Node Name:   chefclient
Environment: _default
FQDN:        ChefClient
IP:          10.0.2.15
Run List:    recipe[apache_tutorial]
Roles:
Recipes:
Platform:    ubuntu 12.04
Tags:

To force our chefclient to run this recipe and check into our chef server:

1
$ knife ssh "name:chefclient" -x vagrant -P vagrant "sudo chef-client"

References

A Chef Primer

Vagrant

My focus was to learn about Chef while using Vagrant for easy machine management. I’m pretty familiar with the basics of vagrant already but there were two extras I needed for this project: 1. Quick snapshoting capabilities 2. Multi-machine setup for a Chef server and node

For 1. turns out you need a plugin for that. There are a few out there but I went with vagrant-vbox-snapshot.

Snapshot plugin installation:

1
vagrant plugin install vagrant-vbox-snapshot

The base commands I care about are:

1
2
vagrant snapshot take <machine_name> $snapshotname
vagrant snapshot back <machine_name>

Multi-machine mode was fairly straightforward to configure. Here are the relevant pieces from my Vagrantfile:

1
2
3
4
5
6
7
8
9
10
11
12
13
Vagrant.configure("2") do |config|

    config.vm.define "chef-server", primary: true do |chefserver|
        chefserver.vm.network :private_network, ip: "192.168.50.100"
        chefserver.vm.box = "precise64"
    end

    config.vm.define "chef-node" do |chefnode|
        chefnode.vm.network :private_network, ip: "192.168.50.10"
        chefnode.vm.box = "precise64"
    end

    end

To jump between these two boxes you’ll now need to specify the machine name. I configured the chef server as the default machine with primary: true but you’ll need to refer to chef-node by name in your vagrant commands. For example, you can do vagrant ssh chef-node.

Chef Notes

Chef key terms:

  • server – stores infrastructure pieces
  • workstation – where you interact with chef server
  • nodes – a node in your infrastructure
  • resources – items to be manipulated (directories, files, etc.)
    • Represents a piece of the system and state. Such as a package to be installed, service to be running, file to be generated, user to be managed, etc.
  • recipe – configuration files that describe resources and their desired state. the “work-horse” of chef
  • cookbook – hold recipes, templates, files, and custom resources.
  • organizations – enterprise chef independent tenants
  • environments – start with a single environment, can tag different life-stages and contain different data attributes.
  • roles – represent types of servers. roles define policies.
  • run list – list of chef configuration files that should be applied
  • nodes – represent the machines to be managed. can have 0+ roles. belong to one environment and one organization

chef-client * Runs on each node * gathers current system config and * pulls down policy from chef server and enforce the policy on node

High-level execution steps

How Chef brings a machine in-line with policy: 1. Chef client periodically polls chef server to determine what policies should be running 2. The chef server figures that out and provides the client with a run list 3. The chef-client looks at each recipe in the run list and determines if it is in line with that policy.

Chef-server Install

  1. Download system package from chef install site
  2. Depending on your platform, you’ll probably utilize ‘rpm’ or ‘dpkg’ to install that
  3. Ensure that DNS is properly configured for the server, or fake it by editing the /etc/hosts file
  4. run sudo chef-server-ctl reconfigure which kicks off what essentially looks like a chef cookbook to build the chef server
  5. You’ll now have access to a chef web front-end on the server on standard web ports
  6. You can login with admin / p@ssw0rd1

Chef workstation Install

This is the computer(s) where you will manage the chef cookbooks and recipes. You should always be working from within your chef-repo (see further down).

Quick install method

1
curl -L https://www.opscode.com/chef/install.sh | sudo bash

This includes: * ruby * knife * chef-client * ohai

You can also utilize ruby’s gem installer with:

1
2
3
4
sudo gem install chef
#or 
gem install --user-install chef
export PATH="~/.gem/ruby/1.9.1/bin/:$PATH"

Chef-repo

To set-up a propery formatted chef repo, start from https://github.com/opscode/chef-repo.git. You’ll need to pull down a template repository and then link your repository to our chef server.

1
2
3
4
git clone https://github.com/opscode/chef-repo.git
mkdir chef-repo/.chef
touch chef-repo/.chef/chef-validator.pem
touch chef-repo/.chef/admin.pem

Next, you’ll need to pull in the certificates from the server. Log back into the web interface. Click Clients tab, then Chef-validator’s edit, and regenerate the Private key. Copy the private key text from that page into the chef-validator.pem file we just created earlier. Do the same thing for the admin users, start with the Users tab and then dump the admin user’s private key into the admin.pem file we created earlier.

Knife

knife is one of the primary command-line tools for managing chef instances. In order to bootstrap our knife configuration, you’ll need to run the knife initial command:

1
2
3
4
5
6
7
8
9
10
11
12
13
14
[msheiny:~/git/chef-repo] ± knife configure -i
WARNING: No knife configuration file found
Where should I put the config file? [/home/msheiny/.chef/knife.rb] .chef/knife.rb
Please enter the chef server URL: [https://sheiny-desktop.sheiny.com:443] https://chefserver
Please enter a name for the new user: [msheiny]
Please enter the existing admin name: [admin]
Please enter the location of the existing admin's private key: [/etc/chef-server/admin.pem] .chef/admin.pem
Please enter the validation clientname: [chef-validator]
Please enter the location of the validation key: [/etc/chef-server/chef-validator.pem] .chef/chef-validator.pem
Please enter the path to a chef repository (or leave blank): /home/msheiny/git/chef-repo
Creating initial API user...
Please enter a password for the new user:
Created user[msheiny]
Configuration file written to /home/msheiny/git/chef-repo/.chef/knife.rb

You can commit the repository at this time if you want. Just be weary of ensuring that the *pem files do not get commited or you might want to exclude the entire .chef directory altogether.

Test to make sure everything is working correctly by running – knife user list

Chef client Install

We can bootstrap a chef client into our instance with help from knife!

1
[msheiny:~/git/chef-repo] ± knife bootstrap chefclient.sheiny.com -x vagrant -P vagrant -N chefclient --sudo

The third argument is the fqdn of the node, -x and -P are the username/password, and -N is the name we want to refer to our new client by.

After that is done we can confirm with client list and we should see chefclient as part of the list:

1
[msheiny:~/git/chef-repo] ± knife client list

Resources

Mikrotik and Me

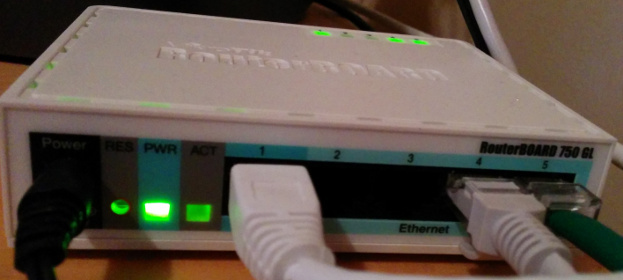
So I stumbled across a company out of Latvia that produces a line of hardware routers and manages their own Linux-based network operating system. The hardware is called Routerboard and the operating system is RouterOS. I needed a cheap but feature-filled home router and ended up picking up the RB750GL off Amazon. I can’t speak to performance or stability yet but so far I’m very happy with the extensibility and feature-set of RouterOS. I’ve always run dd-wrt in the past but have been turned off by the lack of documentation and the hoops you have to jump through to do more advanced tasks outside the web interface. ssh logins

SSH key logins

You must utilize DSA ssh keys if you’d like to use ssh key authentication. From a linux host use ssh-keygen and the -t argument:

1
2
ssh-keygen -t dsa -i .ssh/mikrotik
scp .ssh/mikrotik.pub $mikrotik_ip:

on the mikrotik:

1
[msheiny@mikrotik] > /user ssh-keys import public-key-file=mikrotik.pub user=msheiny

IPv6 with comcast

Comcast uses DHCP-PD to pass along our /64 network prefix. Add a dhcpv6 client to our external interface:

1
2
/ipv6 dhcp-client
add add-default-route=yes interface=ether1-gateway pool-name=comcast

and then add firewall rules:

1
2
3
4
5
6
7
8
9
/ipv6 firewall filter
add chain=input connection-state=established
add chain=input connection-state=related
add chain=input dst-port=546 in-interface=ether1-gateway protocol=udp
add chain=input in-interface=ether1-gateway protocol=icmpv6
add action=drop chain=input in-interface=ether1-gateway
add chain=forward connection-state=established
add chain=forward connection-state=related
add action=drop chain=forward connection-state=invalid

advertise that route to our internal client ports:

1
2
/ipv6 address
add eui-64=yes from-pool=comcast interface=ether4    

Finishing up

Let’s turn off services we arent using:

1
2
3
4
5
6
7
8
9
10
11
12
13
14
15
/ip firewall service-port
set ftp disabled=yes
set tftp disabled=yes
set irc disabled=yes
set h323 disabled=yes
set sip disabled=yes
set pptp disabled=yes
/ip hotspot service-port
set ftp disabled=yes
/ip service
set telnet disabled=yes
set ftp disabled=yes
set api disabled=yes
set winbox disabled=yes
set api-ssl disabled=yes

Configure ntp:

1
2
3
4
5
/system clock
set time-zone-name=America/New_York

/system ntp client
set enabled=yes mode=unicast primary-ntp=x.x.x.x secondary-ntp=y.y.y.y

Hostname:

1
2
/system identity
set name=homerouter

ToDo

  • Get a cron job going updating a dynamic dns entry. So far I’ve had success using the following code that is specific for no-ip.com that I found on the Mikrotik script repository:
1
2
3
4
5
6
7
8
9
10
11
12
13
14
15
16
17
18
19
20
21
22
23
##############Script Settings##################

:local NOIPUser "sheiny"
:local NOIPPass "asdasdzxdzsdfsfdsfxf"
:local WANInter "ether1-gateway"
:local NOIPDomain "myhost"

###############################################


:local IpCurrent [/ip address get [find interface=$WANInter] address];
:for i from=( [:len $IpCurrent] - 1) to=0 do={
    :if ( [:pick $IpCurrent $i] = "/") do={
     :local NewIP [:pick $IpCurrent 0 $i];
     :if ([:resolve $NOIPDomain] != $NewIP) do={
       /tool fetch mode=https user=$NOIPUser password=$NOIPPass url="https://dynupdate.no-ip.com/nic/update\3Fhostname=$NOIPDomain&myip=$NewIP" keep-result=no
       :log info "NO-IP Update: $NOIPDomain - $NewIP"
      }
    }
}

    Get a VPN up and running (or maybe just utilize SSH with keys + forwarding)
    Script to email daily digest of network activity and router status changes

Freeradius and Google Authenticator

Caveat

freeradius is a bit baffling to get a full grasp on and I don’t pretend to be an expert. My goals were two-fold – radius users authenticate against pam (rlm_pam) with two-factor google authenticator and ensure freeradius doesn’t have to run as root.

Logistically, The two-factor code will come in AFTER (no space, enter, etc) the user’s password like:

1
2
user: <username>
password: <password><googlecode>

Radius Files

By default, freeradius config files will be found in /etc/raddb. From the start you will be concerned with:

  • radiusd.conf – lists all the relevant paths of radius files. sets radiusd permissions
  • sites-enabled/default – default site configuration parameters specified. Lists enabled modules for aaa
  • clients.conf – This file defines radius clients by IP or subnet that are allowed to connect, client specific parameters, and where you will indicate the secret shared key.
  • users – You can list users in this file if you want and define parameters of groups. This is an optional file technically which is enabled by default thanks to the ‘files’ parameter listed in the ‘default’ sites file.
  • /etc/pam.d/radiusd – pam parameters to run for the radiusd rlm_pam module

In radiusd.conf, modified the following under the authenticate section (used to be pap):

1
2
3
Auth-Type PAP {
      pam
}

So, I wanted to allow users on the local system that are in the switchuser group and also a user named rancid. Everyone else should fail out. My rancid user is used for scraping configs and doesn’t have full command rights. Part of this setup involves configuring the privilege level commands on the IOS device itself. I set some system specific Appended the following to users:

1
2
3
4
5
6
7
8
9
10
11
12
13
14
15
16
17
18
19
# 
# Allow Unix users that are in the switchuser group
#
DEFAULT Group == 'switchuser' 
    foundry-privilege-level := 0,
    foundry-command-string := "*",
    cisco-avpair = "shell:priv-lvl=4",

#
# Rancid user is only allowed show run commands
#
rancid
    foundry-command-string := "show running-config ;show conf*; show vlan",
    foundry-privilege-level := 5,
    foundry-command-exception-flag := 0,
    cisco-avpair = "shell:priv-lvl=4",

# On no match, the user is denied access.
DEFAULT Auth-Type := REJECT

Google Authenticator Pam “Hack”

I use the term “hack” very very loosely. I merely just commented out a line really. Okay, 4 lines. ahem Anyways…

If you run radiusd without root permissions, you’ll have problems trying to use the google auth pam module. This is because it wants to change uid/gid to the incoming user by default. I did three things to get around this:

  1. I set the secret=/var/run/user/${USER}/.google_authenticator parameter. Will need all users to copy their files here and chown this folder to the same user that will be running radiusd
  2. I forced the user with the user=radiusd
  3. I re-compiled the source for the google pam module and commented out a fail value when it tries to change group id. (see below)
1
2
3
4
5
6
7
8
9
10
11
12
13
14
15
16
17
18
19
20
21
22
23
24
25
26
27
28
29
*** pam_google_authenticator.c  2012-05-14 21:32:27.000000000 -0400
--- /tmp/libpam-google-authenticator-1.0/pam_google_authenticator.c     2014-03-05 13:17:33.777588058 -0500
***************
*** 311,320 ****
        // Inform the caller that we were unsuccessful in resetting the uid.
        *old_uid = uid_o;
      }
!     log_message(LOG_ERR, pamh,
!                 "Failed to change group id for user \"%s\" to %d", username,
!                 (int)gid);
!     return -1;
    }
  
    *old_uid = uid_o;
--- 311,325 ----
        // Inform the caller that we were unsuccessful in resetting the uid.
        *old_uid = uid_o;
      }
!     //      In order to run RADIUS without root permissions, I commented
!     //      out the failure on setgroup and logging code below. This also
!     //      required me to feed the 'user=' option in the pam radius file.
!     //
!     //log_message(LOG_ERR, pamh,
!     //            "Failed to change group id for user \"%s\" to %d", username,
!     //            (int)gid);
!     // return -1;
    }

    *old_uid = uid_o;

My /etc/pam.d/radiusd now looks like:

1
2
3
4
5
6
7
#%PAM-1.0
auth     required       pam_google_authenticator.so forward_pass secret=/var/run/user/${USER}/.google_authenticator user=radiusd
auth     requisite      pam_nologin.so
auth     include        common-auth
account  include        common-account
password include        common-password
session  include        common-session

forward_pass produces the functionality explained at the top (google code follows password).

Fire!

Start up the server in debug mode with:

1
[msheiny:~] $ radiusd -X

Start firing packets at your instance with:

1
[msheiny:~] $ radtest msheiny {password}{google_code} localhost {port} {shared_key}
  • shared_key is a value found in the clients file